
STM32で4x4キーパッドの入力をUARTでPCに送る方法
はじめに
こんにちは!CureSabaです。
ここではSTM32と4x4キーパッドを使い、押したキーの文字をPCにUART通信で送る方法を簡単にまとめます。
配線(ピン定義)
キーパッドの行と列をSTM32に下記の通り接続してください。
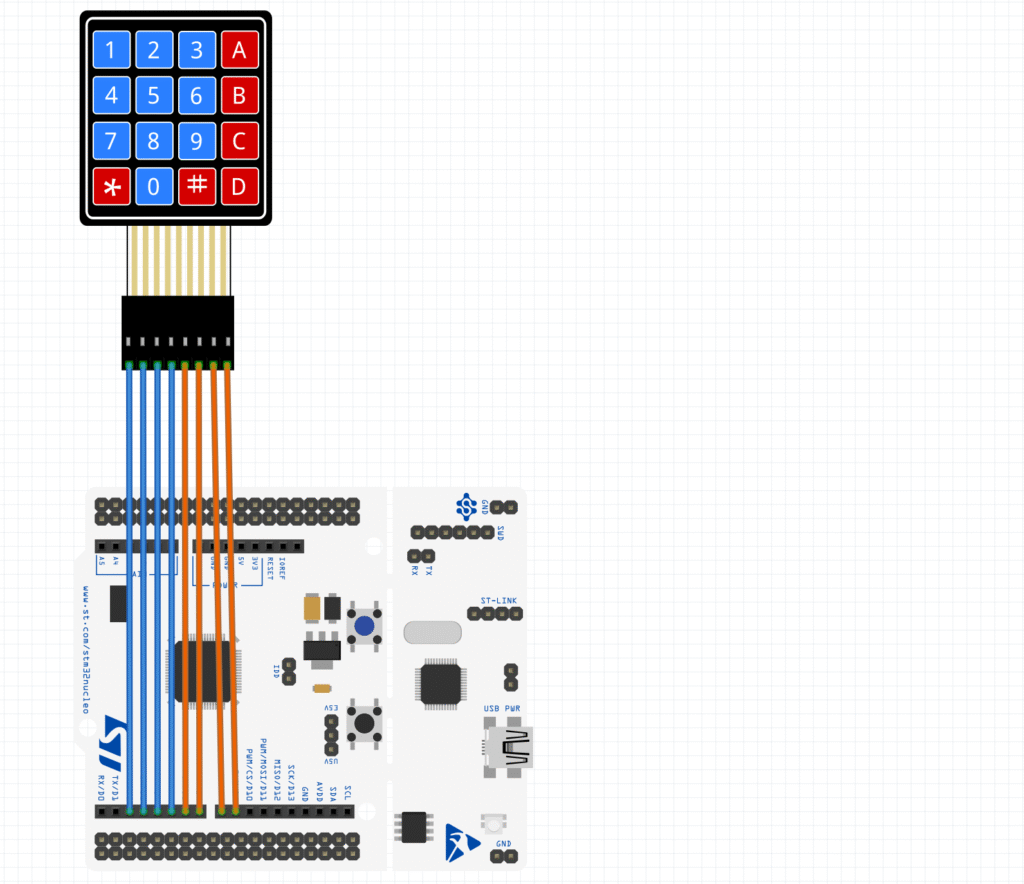
- 行ピン(出力)
- row1: GPIOA_PIN10
- row2: GPIOB_PIN3
- row3: GPIOB_PIN5
- row4: GPIOB_PIN4
- 列ピン(入力プルアップ)
- col1: GPIOB_PIN10
- col2: GPIOA_PIN8
- col3: GPIOA_PIN9
- col4: GPIOC_PIN7
ピン定義例(main.h):
#define row1_Pin GPIO_PIN_10
#define row1_GPIO_Port GPIOA
#define row2_Pin GPIO_PIN_3
#define row2_GPIO_Port GPIOB
#define row3_Pin GPIO_PIN_5
#define row3_GPIO_Port GPIOB
#define row4_Pin GPIO_PIN_4
#define row4_GPIO_Port GPIOB
#define col1_Pin GPIO_PIN_10
#define col1_GPIO_Port GPIOB
#define col2_Pin GPIO_PIN_8
#define col2_GPIO_Port GPIOA
#define col3_Pin GPIO_PIN_9
#define col3_GPIO_Port GPIOA
#define col4_Pin GPIO_PIN_7
#define col4_GPIO_Port GPIOC
主要なコード例
1. キーパッドのスキャン関数
const char keypad[4][4] = {
  { '1', '2', '3', 'A' },
  { '4', '5', '6', 'B' },
  { '7', '8', '9', 'C' },
  { '*', '0', '#', 'D' }
};

const uint16_t row_pins[4] = { row1_Pin, row2_Pin, row3_Pin, row4_Pin };
GPIO_TypeDef *row_ports[4] = { row1_GPIO_Port, row2_GPIO_Port, row3_GPIO_Port, row4_GPIO_Port };
const uint16_t col_pins[4] = { col1_Pin, col2_Pin, col3_Pin, col4_Pin };
GPIO_TypeDef *col_ports[4] = { col1_GPIO_Port, col2_GPIO_Port, col3_GPIO_Port, col4_GPIO_Port };

char ReadKey() {
  for (int r = 0; r < 4; r++) {
    for (int i = 0; i < 4; i++)
      HAL_GPIO_WritePin(row_ports[i], row_pins[i], GPIO_PIN_SET);
    HAL_GPIO_WritePin(row_ports[r], row_pins[r], GPIO_PIN_RESET);
    for (int c = 0; c < 4; c++) {
      if (HAL_GPIO_ReadPin(col_ports[c], col_pins[c]) == GPIO_PIN_RESET) {
        HAL_Delay(20);
        if (HAL_GPIO_ReadPin(col_ports[c], col_pins[c]) == GPIO_PIN_RESET)
          return keypad[r][c];
      }
    }
  }
  return 0;
}
2. UARTで送信(main関数)
UART_HandleTypeDef huart2; // UART2を使う場合

int main(void) {
  HAL_Init();
  SystemClock_Config();
  MX_GPIO_Init();
  MX_USART2_UART_Init();

  char prev = 0;
  while (1) {
    char key = ReadKey();
    if (key && prev != key) {
      HAL_UART_Transmit(&huart2, (uint8_t*)&key, 1, 100);
      HAL_UART_Transmit(&huart2, (uint8_t*)"\r\n", 2, 100);
      prev = key;
    }
    if (!key) prev = 0;
    HAL_Delay(20);
  }
}
UART初期化部分(CubeMXで自動生成される部分を使うのが簡単です)
実行結果
PCでTermiusなどを使いUARTポートを開くと、
キーパッドを押したときに対応する文字が表示されます。
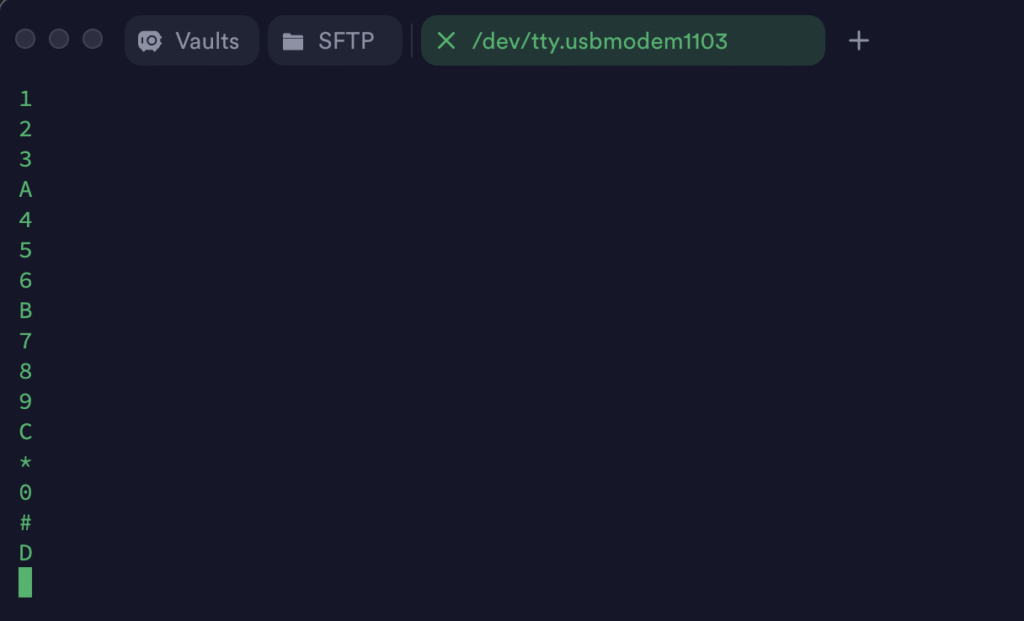
(UARTターミナル画面例)
参考リンク
おわりに
この記事が役立ったらぜひコメントやシェアを!
質問・改善点も気軽にどうぞ。
ソース:上記公式リンク参照
